Installing Sproutcore on Windows (with Screenshots)
Most Sproutcore developers working on Windows are used to the installer, which is also the default choice on the download page.
Since lately the installer seems to be a little unreliable I decided to try the manual way and screenshot the whole process so that it might be of help to others.
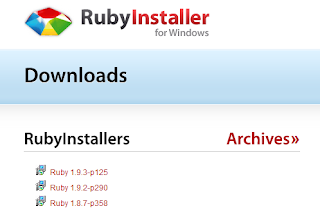
The first thing to do is install Ruby for Windows, which can be conveniently fetched from http://rubyinstaller.org/. I recommend you pick version 1.9.2 which, at the moment, I believe is the version used by most of the Sproutcore developers.
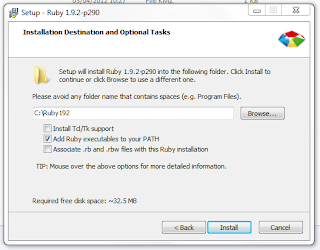
Installing is a breeze, just remember to tick the 'Add Ruby to your path' box so that you don't have to do it yourself later. If you have other ruby versions installed and you DO care about which version is selected by default than it's up to you whether or not to tick the box.
If unsure just tick the box.
When the installer is done open a command prompt (just type cmd in the run box on the Start menu and select the black icon on top of the list). In the command prompt type:
and wait for the whole process to end. The full output is shown in the image on the right. Sproutcore is now installed and you can head to the guides to start using it right away!
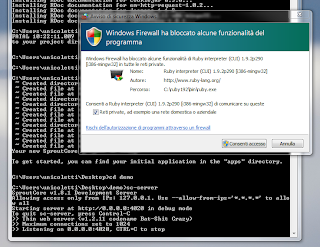
The first time you start sc-server Windows Firewall might ask you to allow the ruby process to open a network port on your computer, just say yes or you won't be able to use the live preview of your apps.
If you're worried about security remember that Sproutcore 1.8 and higher only allows connections from localhost by default, so it's pretty tight.
Since lately the installer seems to be a little unreliable I decided to try the manual way and screenshot the whole process so that it might be of help to others.
The first thing to do is install Ruby for Windows, which can be conveniently fetched from http://rubyinstaller.org/. I recommend you pick version 1.9.2 which, at the moment, I believe is the version used by most of the Sproutcore developers.
Installing is a breeze, just remember to tick the 'Add Ruby to your path' box so that you don't have to do it yourself later. If you have other ruby versions installed and you DO care about which version is selected by default than it's up to you whether or not to tick the box.
If unsure just tick the box.
When the installer is done open a command prompt (just type cmd in the run box on the Start menu and select the black icon on top of the list). In the command prompt type:
gem install sproutcore
and wait for the whole process to end. The full output is shown in the image on the right. Sproutcore is now installed and you can head to the guides to start using it right away!
The first time you start sc-server Windows Firewall might ask you to allow the ruby process to open a network port on your computer, just say yes or you won't be able to use the live preview of your apps.
If you're worried about security remember that Sproutcore 1.8 and higher only allows connections from localhost by default, so it's pretty tight.


